- My Forums
- Tiger Rant
- LSU Recruiting
- SEC Rant
- Saints Talk
- Pelicans Talk
- More Sports Board
- Winter Olympics
- Fantasy Sports
- Golf Board
- Soccer Board
- O-T Lounge
- Tech Board
- Home/Garden Board
- Outdoor Board
- Health/Fitness Board
- Movie/TV Board
- Book Board
- Music Board
- Political Talk
- Money Talk
- Fark Board
- Gaming Board
- Travel Board
- Food/Drink Board
- Ticket Exchange
- TD Help Board
Customize My Forums- View All Forums
- Show Left Links
- Topic Sort Options
- Trending Topics
- Recent Topics
- Active Topics
Started By
Message
 1
1

Posted on 9/5/23 at 12:12 pm to SkintBack
With the shear flange I have maybe about 1” front the garage door rails which is why I always work on it with doors open if doing anything at transom
I have probably about 1’ in front of the bow which lets me walk around the front of the bow without having to shimmy around it excessively. I could have maybe built the 18.5 if I only used a 2” shear flange and only gave myself half inch from and back but it wouldn’t have been worth fighting that.
This size is just right for building in a 20x20 garage which actually isn’t 20 once you take into account doors sheetrock etc.
The guys build I visited built his right at about 17’ so that he could fit it in his garage with motor mounted and on trailer with a swing tongue but I wasn’t worried about storing boat in garage once built so I didn’t want to sacrifice the length, stability, and whatever buoyancy I would give.
If you crunched the numbers hard enough you can build the boat at whatever length you want as all that is different about the plans is the spacing between station 1 and the transom station. For 18.5’ version it’s 18.5” for 17.5’ it’s 6.5”
This post was edited on 9/5/23 at 12:14 pm
Posted on 9/6/23 at 10:01 am to Timmayy
I always wanted to try this. Its definitely something on my bucket list but I think I will have to wait til the kids are older and they no longer want to hang out.
Posted on 9/6/23 at 1:48 pm to diehard24
Have them hang out in the garage with a sanding block. Even better mixing epoxy!
Posted on 9/14/23 at 8:04 am to Timmayy
Got her coated in neat epoxy after the bulk of the seams and screw holes were filled. The foam soaked up about a gallon of epoxy. With the foam having soaked up some epoxy it should be easier for me to get all the screw holes perfectly filled and now that the foam isnt so soft when I go to sand compared to the epoxy.
After having done all this I would have not filled any seams with thickened epoxy and just done screw holes then do neat epoxy then go back and tart filling seams. Thinking the seam filling would be a little cleaner as well probably get a little bit better absorption of epoxy around those seams.
Also would be a little more careful with excess resin as I have a few small pools of resin on the chines and shear but I should be able to clean that up as needed just be a little extra sanding.
Looking for a good weekend end of month or early next month if anyone in Houston area wants to come help fiberglass lol.
Posted on 9/14/23 at 9:04 am to Timmayy
Straight gittin it. Looking good man
Posted on 9/14/23 at 12:23 pm to DTRooster
Fantastic got to see it in the Water.
Posted on 9/14/23 at 2:41 pm to Timmayy
I'll be around the last weekend of September and 1st weekend of October and can lend a hand or two.
Posted on 9/17/23 at 6:58 pm to DWaginHTown
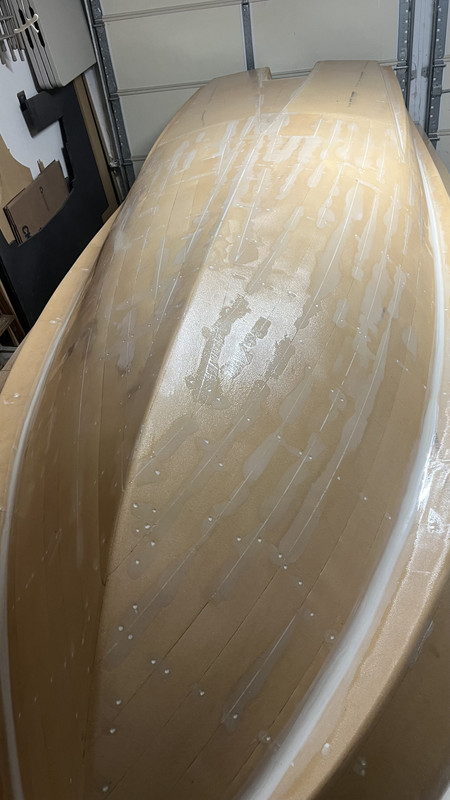
Spent about 6 hours sanding the neat epoxy where it was either sandpaper rough or had made a little pool.
The whole boat is pretty smooth. Probably too smooth to the point I need to come back and hand sand with 36 grit and scuff up before fiberglass. The 60 grit on the orbital is probably too smooth a finish.
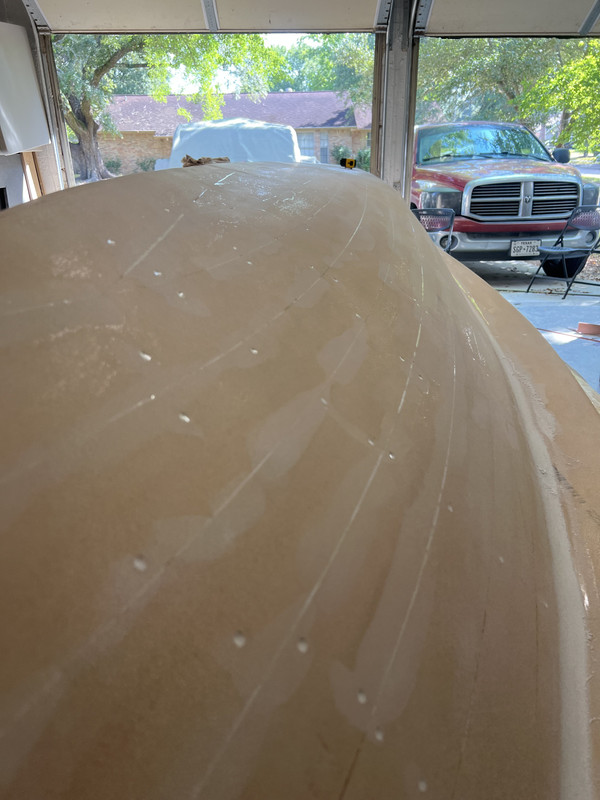
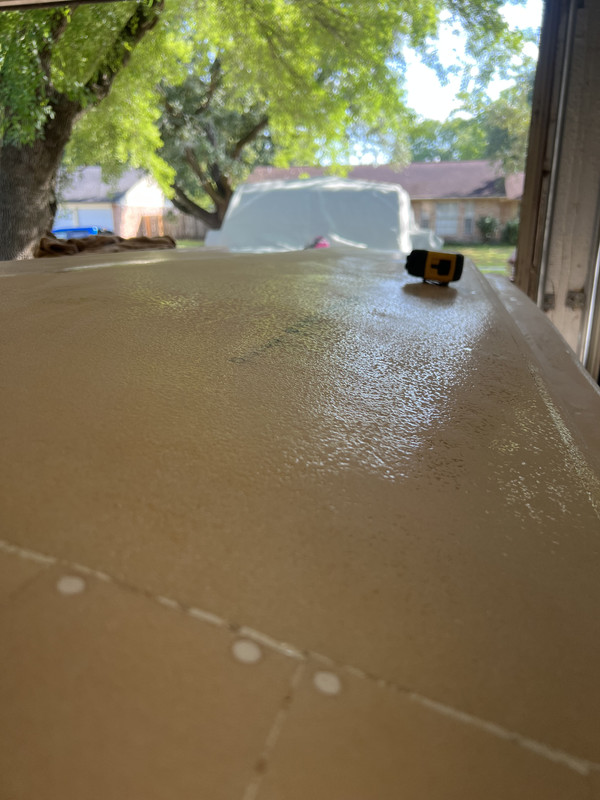
Left some of the orange peel in areas where I didn’t have to do a ton of cleanup figured the texture couldn’t hurt anything.
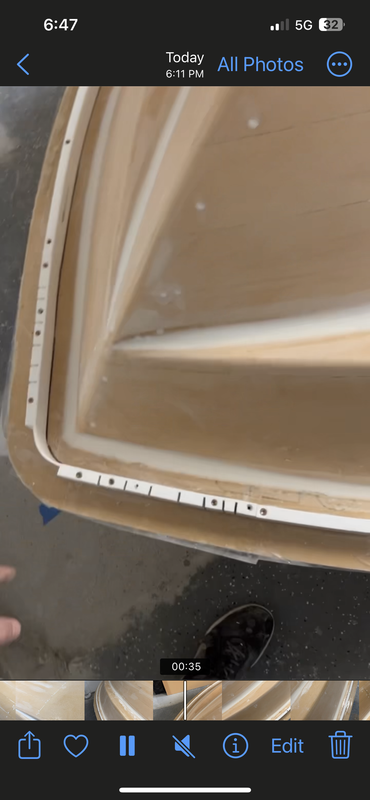
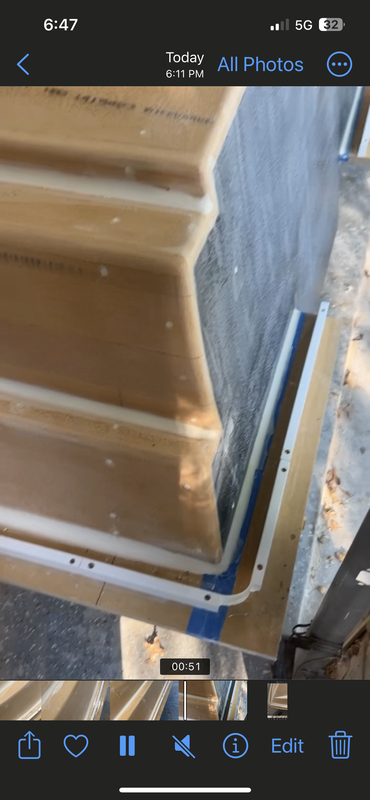
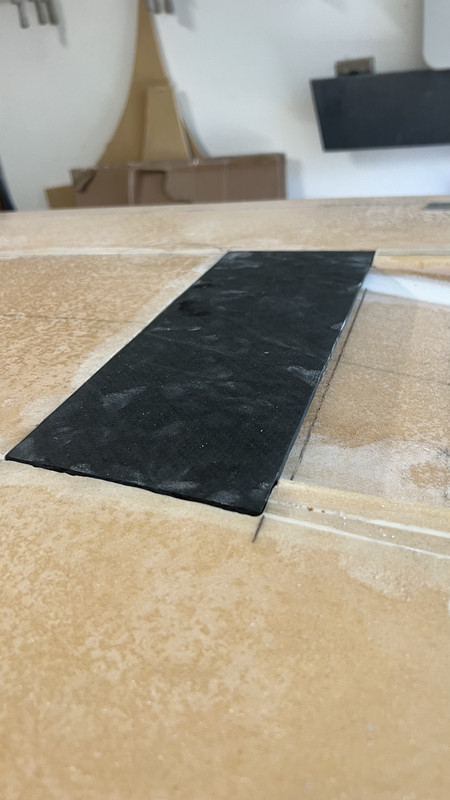
After that got the shearflange in which went much faster and easier than I expected. Just used a 2” wide block and ran it around the whole boat to trace a line and then just screwed the 1x2” pvc trim down on the line.
One final round of screw hole divot filling and some leftover seam filling and that’s about it before glassing.
My bet is it’s going to take me a decent amount of time to precut all the glass as I’m kinda clueless as to how to do some of the seams. Idk will figure it out I guess.
The whole boat is pretty smooth. Probably too smooth to the point I need to come back and hand sand with 36 grit and scuff up before fiberglass. The 60 grit on the orbital is probably too smooth a finish.
Left some of the orange peel in areas where I didn’t have to do a ton of cleanup figured the texture couldn’t hurt anything.
After that got the shearflange in which went much faster and easier than I expected. Just used a 2” wide block and ran it around the whole boat to trace a line and then just screwed the 1x2” pvc trim down on the line.
One final round of screw hole divot filling and some leftover seam filling and that’s about it before glassing.
My bet is it’s going to take me a decent amount of time to precut all the glass as I’m kinda clueless as to how to do some of the seams. Idk will figure it out I guess.
Posted on 9/17/23 at 7:10 pm to Timmayy
quote:
clueless as to how to do some of the seams
A buncha chop strand and poo poo!!
Posted on 9/17/23 at 7:16 pm to DownshiftAndFloorIt
No chopped strand since doing epoxy. Will only be using 10oz basalt plain weave on outside and 10oz eglas plain weave inside.
Will like use some 1708 to beef up certain areas but that’s about it
Will like use some 1708 to beef up certain areas but that’s about it
Posted on 9/28/23 at 8:20 pm to Timmayy
Been kinda slow with working on the boat just doing odds and ends can be kinda slow since the fiberglass it day isn’t until Oct 21.
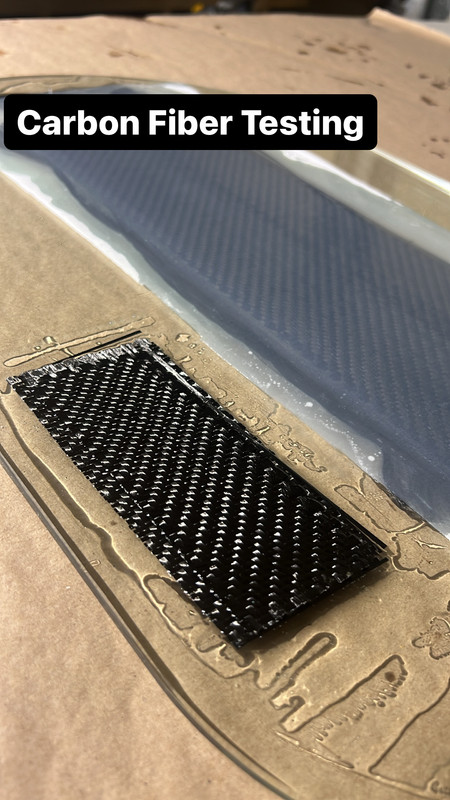
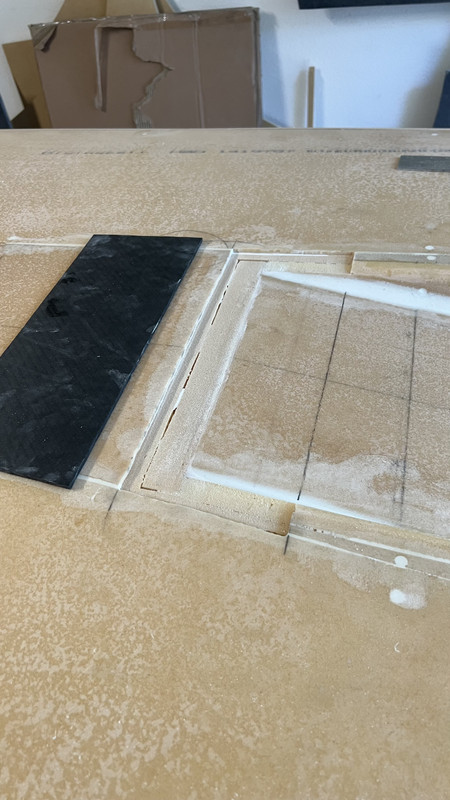
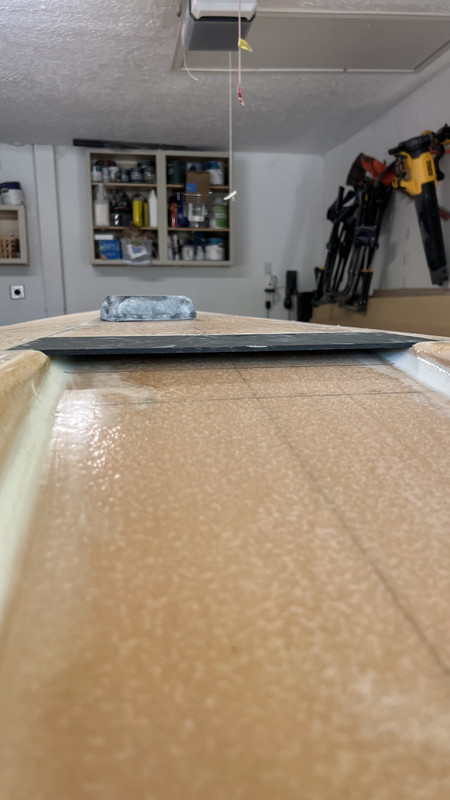
Picked up 2 yards of carbon fiber that I’ll use in strategic places. First place is going to be for the tunnel pocket vent. The tunnel up at the front is going to have an overhang plate that extends 3” to create a pocket where the 1” vent hole is going to be.
I figured a decent way to do that is just going to be straight glass plate that I set into the hull. To do that so the plate doesn’t sit proud on the bottom of the hull I’m going to router the edges of the tunnel where this plate will be down the depth of the width of that fiberglass plate.
After I fiberglass the hull that inset should allow me to epoxy down my plate flush with the flat running pad. Then I can add another piece of glass overtop to tie it all in and then should be pretty easy to fair out.
Laid up 6 layers of 5.7oz (3k) carbon on the wife’s glass serving tray since it was the best surface I could find to make a flat plate. She hasn’t found out yet I’m hoping I can clean it up before she ever notices.
Have no clue if that will be as stiff as I want it to be since it’s basically going to be unsupported on one side but that’s why I figured I could play with carbon. Hopefully it can be pretty stout without having to be super thick.
This post was edited on 9/28/23 at 8:21 pm
Posted on 9/28/23 at 10:35 pm to DownshiftAndFloorIt
quote:
I need to do a lot of work on mine that'll result in needing to repaint the entire inside. Taking carpet out, building new console,
I did basically the same thing on my Ankona Copperhead. I had screwed up the interior of the boat trying to paint over the gelcoat and took it to a guy over in Pasadena to have him fix it. He was really backed up and convinced me I could do it DIY if I didnt need the sprayed slick finish.
I took a sander to it for 4-5 days and got it down to glass showing in some places after 220 finish sanding. Was going to roll and tip it with new gel coat, but loved the very light orange peel rolling only gave it. Went with two full coats with light sanding (400 grit) between and a final coat with the wax additive. I was shocked at the results. 18 months later and it still looks new. The finish is not for everyone, but I love it on a skiff as it provides just enough non-skid without showing a profile from a few feet away.
Tons of videos on gel-coating and when rolled its almost as simple as painting, but more forgiving.
Posted on 9/29/23 at 7:07 am to Timmayy
Really enjoy this thread and watching your progress. How much will it weigh when finished and how are you going to get it out, turned over without damaging anything, and will you need a custom trailer? TIA!
Posted on 9/29/23 at 7:34 am to BFIV
No motor and rigging just built out hull it should be around 600 pounds ish. Depends how much I overbuild everywhere it just in the right areas.
It’ll be a little flimsy whenever I pull it off the jigs and flip but the exterior shell will be the hardness of the final boat hull so it’ll be pretty resilient.
Once flipped back over I’ll put a jig or two in and clamp it so that it maintains the right shape until the inside gets glasses and I put in the bulkheads.
I may do a custom but will likely not. You can just get a standard trailer with adjustable bunks. All you need
Posted on 10/1/23 at 4:42 pm to Timmayy
Got to put in a few hours this weekend. Probably should have finished cutting the basalt today but I took a break around 4 and didn’t feel like getting after it again.
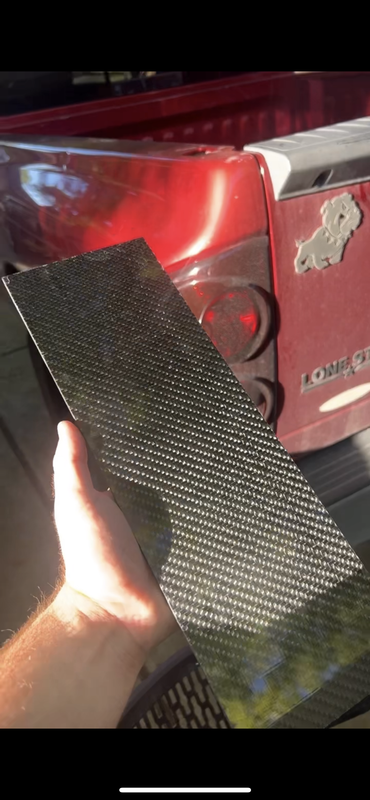
Carbon Fiver plate came out good I think, it’s about 3/16 - 5/32 thick. I went back and did another 5 layers with one laid -45/45 bias. It’s pretty stiff defintiely stiff enough for how it’s being used.
Started cutting cloth Saturday and I’m pretty sure I’m overthinking the corners and how everything overlaps and worrying a little too much about building up high spots etc. it’s actualy been something I’ve been putting off because it’ll stress me out a bit thinking I’m doing it wrong and don’t know any better. Talked to a few guys and think it’s helped me get to the point that I’m overthinking it and I’ll figure it out when glassing and the cloth actualy starts laying how it will lay.
Due to limited space I don’t have a dedicated fiberglassing table but my setup works well and took me all of 5 minutes and three scrap 2x4 to set up.
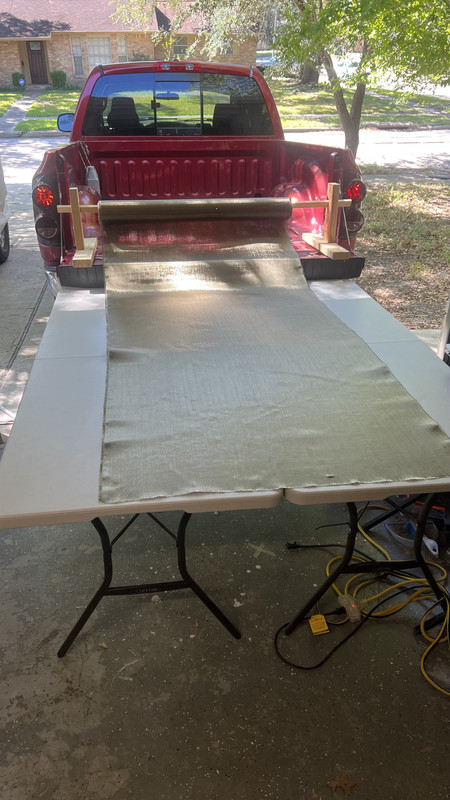
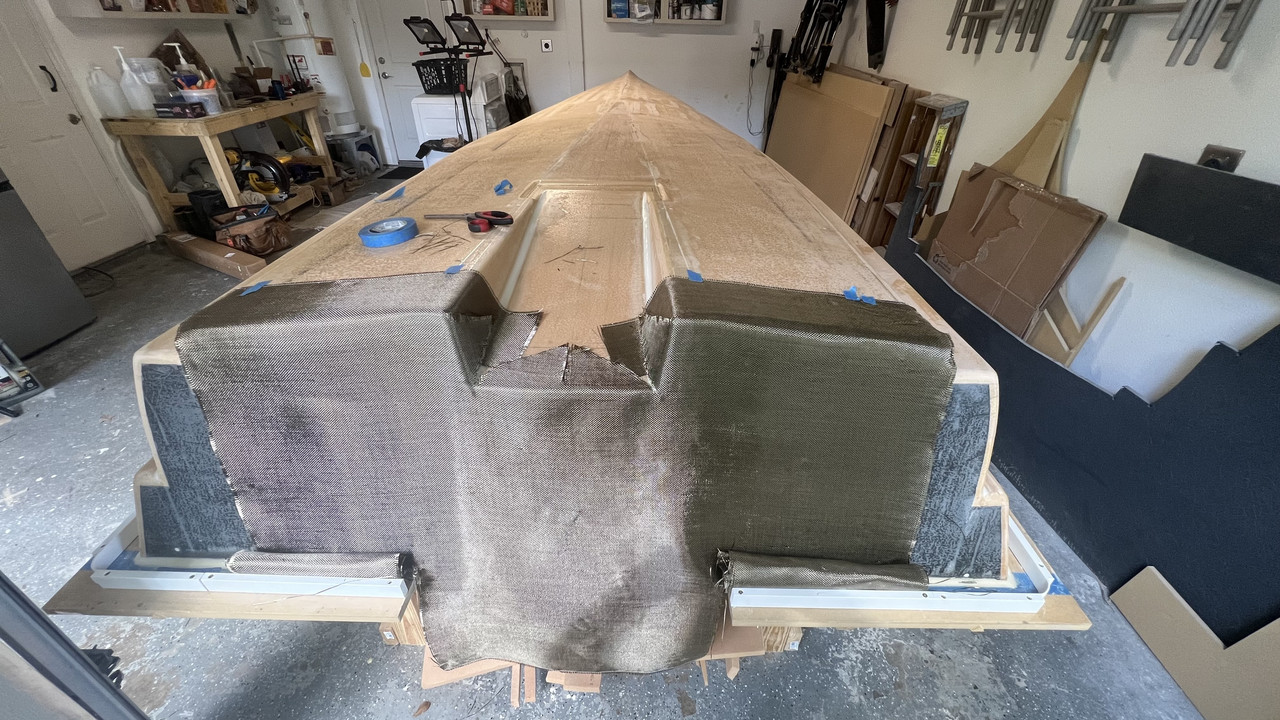

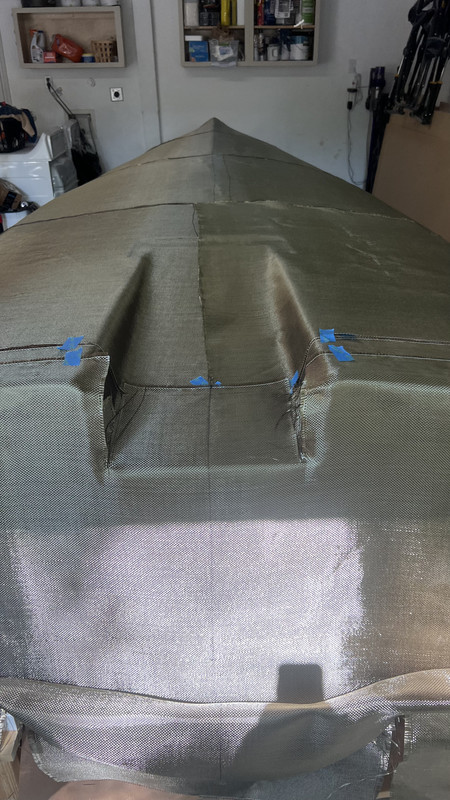
Got one and a half layers cut. Think I’ll save the corner transom pieces and the bow pieces as game day cuts.
Carbon Fiver plate came out good I think, it’s about 3/16 - 5/32 thick. I went back and did another 5 layers with one laid -45/45 bias. It’s pretty stiff defintiely stiff enough for how it’s being used.
Started cutting cloth Saturday and I’m pretty sure I’m overthinking the corners and how everything overlaps and worrying a little too much about building up high spots etc. it’s actualy been something I’ve been putting off because it’ll stress me out a bit thinking I’m doing it wrong and don’t know any better. Talked to a few guys and think it’s helped me get to the point that I’m overthinking it and I’ll figure it out when glassing and the cloth actualy starts laying how it will lay.
Due to limited space I don’t have a dedicated fiberglassing table but my setup works well and took me all of 5 minutes and three scrap 2x4 to set up.
Got one and a half layers cut. Think I’ll save the corner transom pieces and the bow pieces as game day cuts.
This post was edited on 10/1/23 at 4:45 pm
Posted on 10/1/23 at 6:51 pm to Timmayy
Time for juice!
Posted on 10/1/23 at 7:03 pm to DownshiftAndFloorIt
It’s coming it’s coming. Couple more weeks.
Posted on 10/2/23 at 8:28 pm to Timmayy
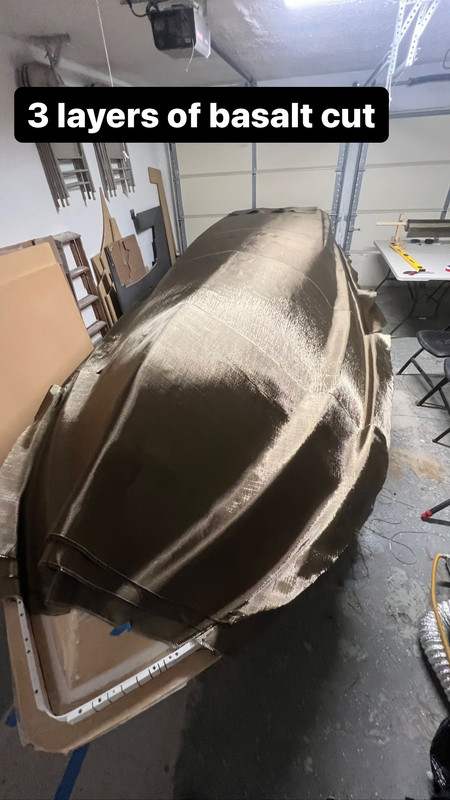
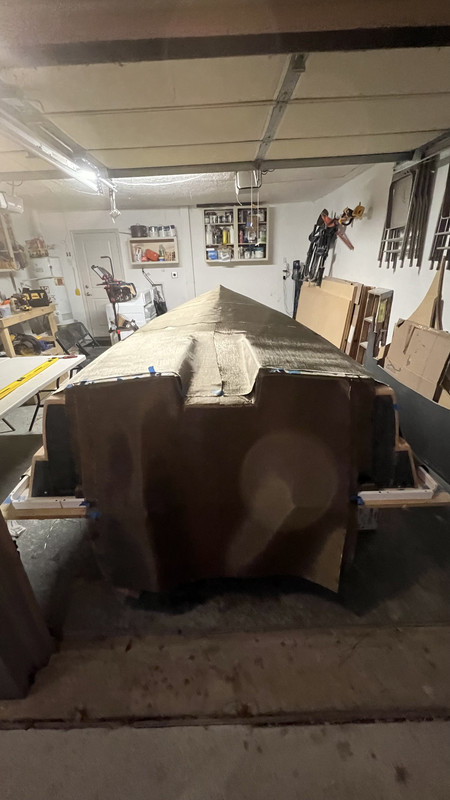
Finished cutting the basalt. Seems like it should lay out pretty well. Still think the stern is gunna be a b**ch but we gone figure it out.
Posted on 10/2/23 at 8:35 pm to Timmayy
Looking good. Can't wait to see it in action.

 Page 7 of 11

Popular
Back to top